
How to Set Up a GNSS Base Station
A correctly installed GNSS Base Station is the foundation of an accurate survey. This guide explains the complete setup process in simple steps, helping beginners and professionals achieve reliable centimeter-level positioning for construction, mapping, and engineering projects.
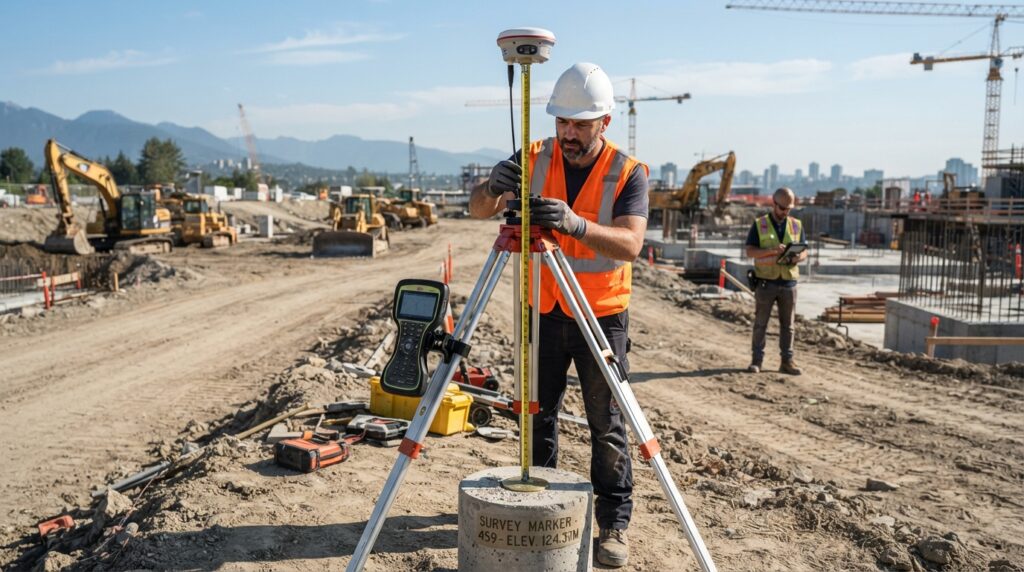
Introduction
Before starting any GNSS survey, the Base Station must be set up correctly. A small mistake during setup can reduce the accuracy of the entire survey. By following the correct procedure, the Base Station can provide reliable correction data that helps GNSS rovers achieve accurate positioning in the field.
This guide explains each step in a simple and practical way so that beginners can understand the setup process with confidence.
Equipment Required
Before setting up the Base Station, make sure you have the following equipment:
- GNSS Receiver
- GNSS Antenna
- Tripod
- Tribrach with Optical Plummet
- Survey Controller
- Battery or External Power Supply
- Radio Antenna or Internet Connection (if required)
- Measuring Tape
- Bubble Level
Step 1 – Select a Suitable Location
Choose an open area where the antenna has a clear view of the sky. Avoid placing the Base Station near tall buildings, trees, bridges, power lines, or metal structures because they can block or reflect satellite signals and reduce accuracy.
Step 2 – Set Up the Tripod
Place the tripod directly over the known control point. Extend the tripod legs evenly and press them firmly into the ground to keep the setup stable. Use the bubble level to make sure the tripod head is approximately level before installing the tribrach.
Step 3 – Install the Tribrach
Attach the tribrach securely to the tripod. Use the optical plummet or laser plummet to center the tribrach precisely over the survey control point. Fine adjustments should be made until the point is perfectly centered.
Step 4 – Mount the GNSS Antenna
Carefully install the GNSS antenna on the tribrach or fixed mount. Tighten all connections and make sure the antenna is standing perfectly vertical.
Step 5 – Measure the Antenna Height
Measure the antenna height carefully according to the manufacturer’s recommended method. Enter the correct antenna height into the survey controller because an incorrect measurement can affect the elevation of every surveyed point.
Step 6 – Configure the Base Station
Turn on the GNSS receiver and connect it to the survey controller. Select the correct coordinate system, enter the known coordinates of the control point, configure the correction format, and choose the communication method such as UHF radio or Internet (NTRIP).
Step 7 – Start Broadcasting Corrections
Once all settings have been checked, start broadcasting correction data. Confirm that the rover is receiving the corrections successfully before beginning the survey.
Step 8 – Verify the Setup
Check a nearby control point with the rover. If the measured coordinates match the known values within the expected accuracy, the Base Station is ready for survey work.
Common Mistakes to Avoid
Many positioning errors happen because of simple setup mistakes. Always check that the tripod is stable, the antenna is centered correctly, the antenna height is measured accurately, and the receiver is using the correct coordinate system. Avoid setting up near objects that may interfere with satellite signals.
Best Practices
Always use a stable control point with known coordinates. Keep batteries fully charged before starting the survey. Check all cables and connections before broadcasting corrections. Monitor satellite availability throughout the survey and record the setup details in your field notes.
Conclusion
Setting up a GNSS Base Station correctly is one of the most important steps in any surveying project. A stable setup, accurate control point, correct antenna height, and proper receiver configuration help ensure reliable centimeter-level positioning for all survey measurements.