How to Set Up an Echoscope 3D Scanner
Prepare Your Echoscope 3D Scanner for Accurate Underwater Imaging
A correct setup is essential for producing clear and accurate real-time 3D sonar images. Every sensor and system should be checked before starting an underwater inspection or hydrographic survey.
Introduction
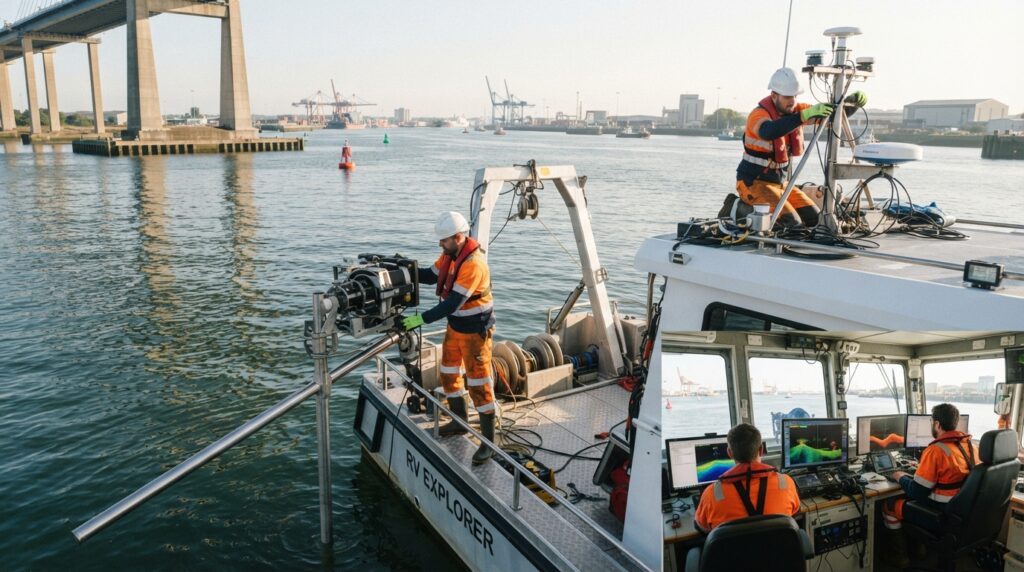
An Echoscope 3D Scanner is a complete sonar imaging system that works with several marine survey sensors. The sonar head, GNSS receiver, motion sensor, heading sensor, survey computer, and software must all be installed and configured correctly.
A proper setup improves image quality, increases survey accuracy, and reduces the chance of data errors.
Equipment Required
Before starting the survey, prepare the following equipment:
- Echoscope 3D Scanner
- Sonar Processor
- Survey Computer
- GNSS Receiver
- GNSS Antenna
- Motion Sensor (INS or MRU)
- Heading Sensor
- Mounting Pole or Deployment Frame
- Marine Power Supply
- Survey Software
- Survey Vessel or Work Boat
Step 1 – Inspect the Equipment
Before installation, inspect all equipment carefully.
Check the sonar head, cables, connectors, brackets, and mounting frame for damage.
Make sure every component is clean and ready for use.
Step 2 – Install the Sonar Head
Secure the Echoscope 3D Scanner on a strong mounting pole or deployment frame.
The sonar head should remain fully underwater during operation.
Position it where it has a clear view of the inspection area without obstruction.
Step 3 – Install the GNSS Antenna
Mount the GNSS antenna at the highest practical location on the vessel.
The antenna should have an open view of the sky for reliable satellite reception.
Measure the position of the antenna relative to the sonar head and record these offsets in the survey software.
Step 4 – Install the Motion and Heading Sensors
Install the Motion Sensor close to the vessel’s center where movement is stable.
Install the Heading Sensor according to the manufacturer’s recommendations.
These sensors help correct the sonar image by compensating for vessel movement.
Step 5 – Connect All Equipment
Connect the sonar head, sonar processor, GNSS receiver, motion sensor, heading sensor, and survey computer.
Check every cable connection before powering on the system.
Verify that all devices communicate correctly.
Step 6 – Configure the Survey Software
Open the survey software and create a new project.
Enter the coordinate system, vessel offsets, sensor offsets, draft value, and other required settings.
Confirm that the software detects every connected sensor.
Step 7 – Check the Live Sonar Image
Power on the Echoscope 3D Scanner and view the live sonar display.
Check that underwater targets appear clearly and that the image updates smoothly in real time.
Adjust the sonar range, gain, and display settings if required.
Step 8 – Perform a System Test
Before beginning the inspection, scan a known object such as a quay wall, bridge pier, or underwater structure.
Confirm that the object appears in the correct position and that the image quality is clear.
If necessary, adjust the system settings before starting the survey.
Step 9 – Start the Survey
Move the survey vessel slowly through the inspection area.
Monitor the live 3D sonar image, vessel position, heading, and sensor status throughout the survey.
Record all sonar data for later review and reporting.
Common Mistakes to Avoid
Poor sonar mounting, incorrect sensor offsets, unstable vessel movement, loose cable connections, and weak GNSS signals can reduce image quality.
Always complete a full system check before starting the inspection.
Best Practices
Inspect the sonar head before every survey.
Keep the sonar face clean.
Use a steady vessel speed during data collection.
Check GNSS quality regularly.
Back up survey data after every project.
Calibrate the system according to the manufacturer’s recommendations.
Conclusion
A properly installed Echoscope 3D Scanner produces clear and reliable underwater images that support safe and accurate inspections. Following the correct setup procedure helps survey teams reduce errors and collect high-quality data for hydrographic surveys, offshore engineering, and underwater construction projects.