How to Set Up a Side Scan Sonar
Prepare Your Side Scan Sonar for Clear and Accurate Seabed Imaging
A properly installed Side Scan Sonar helps surveyors capture high-quality images of the seabed. Correct setup improves image quality, increases survey accuracy, and reduces the risk of missing underwater objects.
Introduction
Before starting a hydrographic survey, the Side Scan Sonar system should be installed and tested carefully.
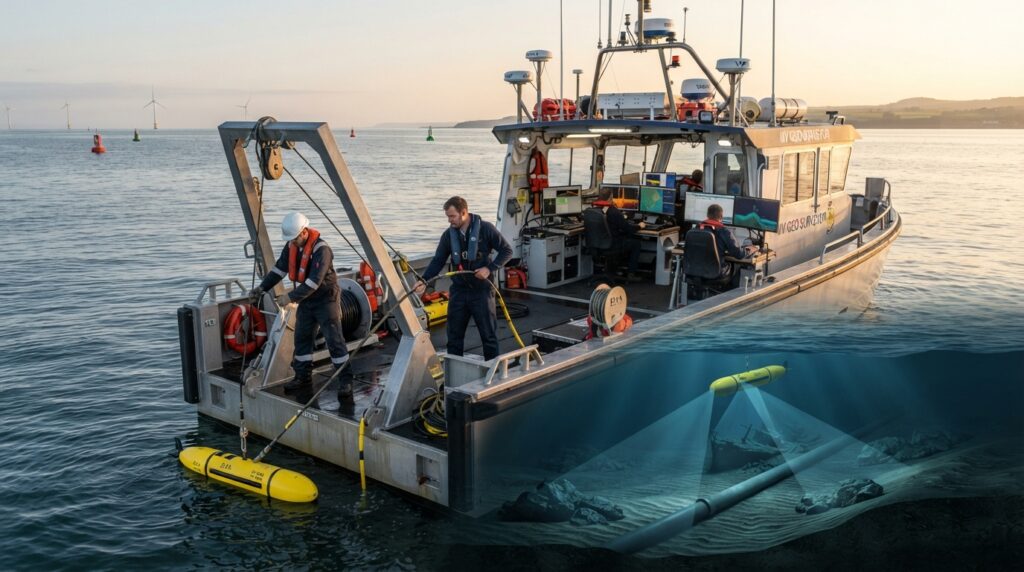
The towfish, tow cable, GNSS receiver, survey computer, and sonar software must all work together correctly. A proper setup ensures that the sonar captures clear seabed images throughout the survey.
Equipment Required
Before installation, prepare the following equipment:
- Side Scan Sonar Towfish
- Armored Tow Cable
- Hydraulic Winch
- Sonar Processor
- GNSS Receiver
- GNSS Antenna
- Survey Computer
- Side Scan Sonar Software
- Power Supply
- Survey Vessel
Step 1 – Inspect the Equipment
Before leaving the port, inspect the Side Scan Sonar towfish, tow cable, connectors, winch, and sonar processor.
Check for damaged cables, loose connectors, water leaks, or physical damage.
Make sure all equipment is clean and ready for use.
Step 2 – Install the Towfish
Connect the Side Scan Sonar towfish securely to the armored tow cable.
Check all locking pins and cable connections.
The towfish should remain balanced during towing to produce stable sonar images.
Step 3 – Connect the Survey System
Connect the sonar processor to the survey computer.
Connect the GNSS receiver and verify that position data is received correctly.
Open the survey software and confirm that all equipment is communicating properly.
Step 4 – Configure the Survey Software
Create a new survey project.
Configure:
- Coordinate System
- Sonar Frequency
- Survey Range
- Recording Settings
- Towfish Layback
- Sonar Channel Settings
- Data Storage Location
Verify that all settings match the project requirements.
Step 5 – Deploy the Towfish
Slowly lower the towfish into the water using the hydraulic winch.
Release enough tow cable so the towfish travels behind the survey vessel without disturbance.
Maintain a safe towing distance throughout the survey.
Step 6 – Adjust Towfish Altitude
The towfish should travel at a steady height above the seabed.
If it is too high, image resolution decreases.
If it is too low, there is a greater risk of hitting underwater obstacles.
Adjust the tow cable length according to the water depth and survey conditions.
Step 7 – Check the Live Sonar Image
View the live Side Scan Sonar display.
Confirm that the seabed image is clear and that both left and right sonar channels are working correctly.
Adjust the gain, contrast, and range if necessary to improve image quality.
Step 8 – Perform a System Test
Before starting the main survey, pass over a known object such as a rock, wreck, or navigation marker.
Check that the object appears clearly in the sonar image.
If required, adjust the sonar settings before continuing.
Step 9 – Start the Survey
Navigate along the planned survey lines at a constant speed.
Monitor:
- Sonar Images
- Vessel Position
- Towfish Position
- Water Depth
- System Status
Record all sonar data for later processing.
Common Mistakes to Avoid
Do not tow the towfish too close to the vessel.
Avoid sudden changes in vessel speed or direction.
Do not allow the towfish to touch the seabed.
Always verify GNSS positioning before recording data.
Inspect cables regularly during long surveys.
Best Practices
Maintain a constant vessel speed.
Keep the towfish at a stable altitude above the seabed.
Monitor image quality throughout the survey.
Save backup copies of sonar data after every project.
Clean the towfish after each survey.
Follow the manufacturer’s maintenance schedule.
Conclusion
A properly installed Side Scan Sonar provides clear and reliable seabed images. Careful installation, correct towfish deployment, and regular system checks help survey teams detect underwater objects accurately and complete hydrographic surveys with confidence.