
How Does Photogrammetry Work?
Understand the Complete Photogrammetry Workflow
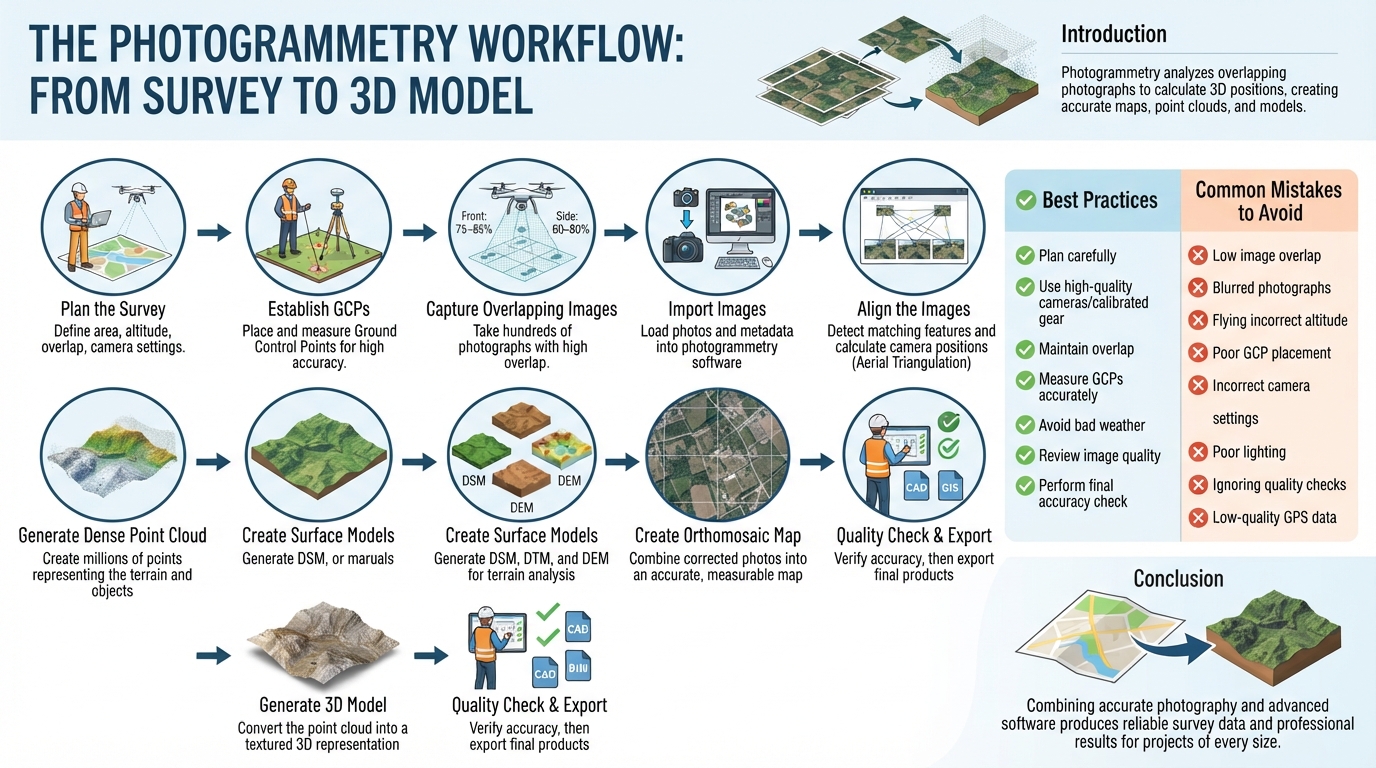
Photogrammetry transforms overlapping photographs into accurate maps, 3D models, and survey data. This guide explains every step of the workflow in simple language, from planning a survey to producing professional mapping products.
Introduction
Photogrammetry works by analysing many overlapping photographs taken from different positions.
Specialized software identifies the same objects appearing in multiple images and calculates their exact position in three-dimensional space. The processed data is then converted into accurate maps, point clouds, terrain models, and realistic 3D models.
Following a proper workflow helps achieve accurate and reliable survey results.
Step 1 – Plan the Survey
Every photogrammetry project begins with proper planning.
Surveyors first define the project area, required accuracy, flight altitude, camera settings, image overlap, and Ground Sampling Distance (GSD).
Good planning improves data quality and reduces processing errors.
Step 2 – Establish Ground Control Points (GCPs)
If high accuracy is required, Ground Control Points (GCPs) are placed throughout the survey area.
Each GCP is measured using an RTK GNSS receiver or Total Station.
These known coordinates help improve the accuracy of the final survey products.
Step 3 – Capture Overlapping Images
The drone, aircraft, or camera captures hundreds or even thousands of photographs.
To ensure accurate processing, every image should overlap with the next image.
Typical overlap values are:
- Front Overlap: 75–85%
- Side Overlap: 60–80%
This overlap allows the software to identify common points between images.
Step 4 – Import Images into Photogrammetry Software
After the flight is complete, all photographs are imported into professional photogrammetry software.
The software reads image information such as camera position, focal length, GPS coordinates, and camera orientation before processing begins.
Step 5 – Align the Images
The software automatically detects matching features that appear in multiple photographs.
Using these matching points, it calculates the position and orientation of every image.
This process is known as image alignment or aerial triangulation.
Step 6 – Generate a Dense Point Cloud
After image alignment, the software creates a dense point cloud.
A point cloud contains millions of individual points that accurately represent the shape of the ground, buildings, vegetation, and other objects.
This point cloud becomes the foundation for all remaining survey products.
Step 7 – Create Surface Models
Using the dense point cloud, the software generates different surface models.
These include:
- Digital Surface Model (DSM)
- Digital Terrain Model (DTM)
- Digital Elevation Model (DEM)
These models help engineers study terrain elevations and land features.
Step 8 – Create an Orthomosaic Map
The software combines all corrected photographs into one seamless image called an orthomosaic.
Unlike a normal aerial photograph, an orthomosaic is geometrically corrected, allowing accurate distance, area, and coordinate measurements.
Step 9 – Generate a 3D Model
The processed point cloud is converted into a textured 3D model.
This model provides a realistic digital representation of the survey area and is widely used in engineering, construction, mining, archaeology, and urban planning.
Step 10 – Quality Check and Export
Before delivering the final results, surveyors perform a quality check.
They verify coordinate accuracy, image alignment, GCP errors, and overall model quality.
After verification, the final products are exported in formats suitable for CAD, GIS, BIM, and engineering software.
Final Survey Products
A photogrammetry survey can produce:
- Orthomosaic Maps
- Dense Point Clouds
- Digital Surface Models (DSM)
- Digital Terrain Models (DTM)
- Digital Elevation Models (DEM)
- Contour Maps
- 3D Models
- Volume Calculations
- Cross Sections
- Surface Measurements
Best Practices
Plan every survey carefully before flying.
Use high-quality cameras and calibrated equipment.
Maintain sufficient image overlap.
Measure Ground Control Points accurately.
Avoid flying during strong winds or poor lighting.
Review image quality before processing.
Always perform a final accuracy check before delivering survey data.
Common Mistakes to Avoid
- Low image overlap
- Blurred photographs
- Flying too high or too low
- Poor Ground Control Point placement
- Incorrect camera settings
- Poor lighting conditions
- Ignoring quality checks
- Using low-quality GPS data
Conclusion
Photogrammetry works by combining accurate photography with advanced software to create reliable survey data. From careful planning and image capture to point cloud generation and 3D modeling, every step plays an important role in producing accurate maps and engineering information. Following the correct workflow helps surveyors achieve professional results for projects of every size.